
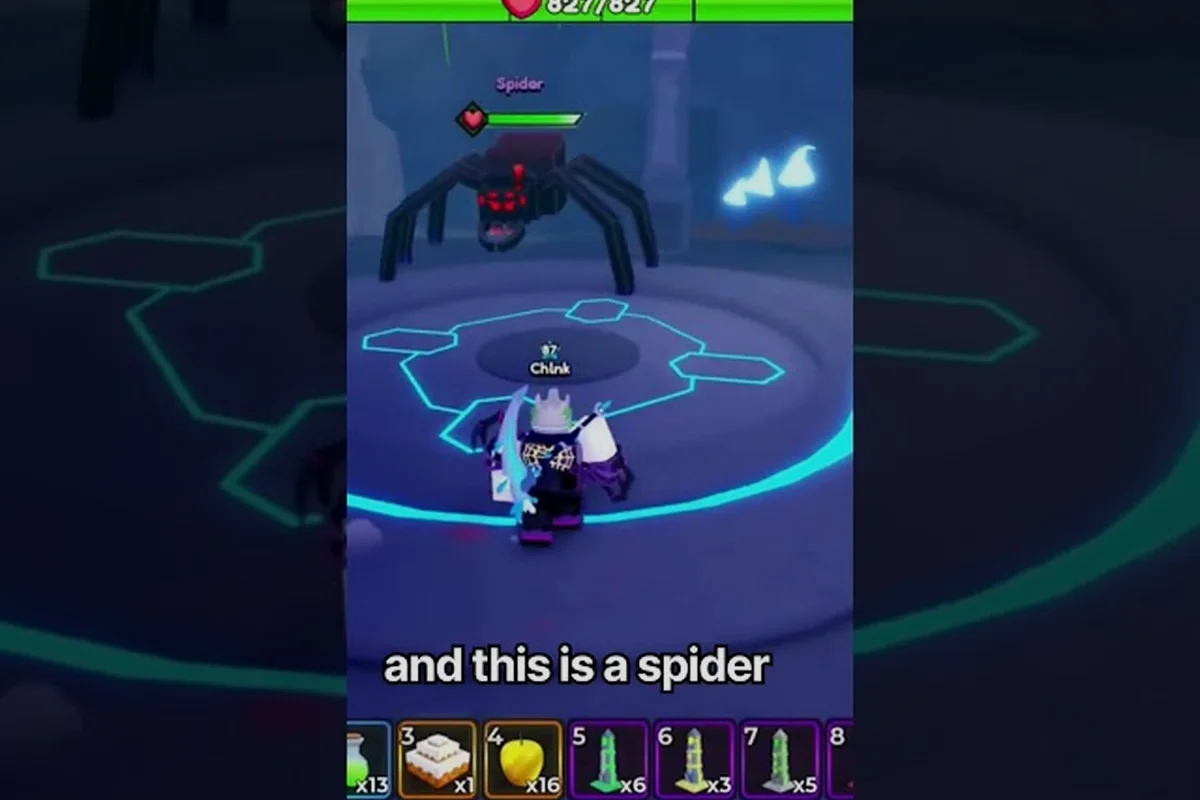
The poly loot spider boss location sits roughly in the middle of the six-boss ladder, which makes it a critical milestone for anyone chasing every badge the game offers. Spider is the natural follow-up after King Chicken and the warm-up for the more punishing Hero Nay and Hunter Robin pair, so learning its arena path now pays off twice. This guide breaks down the exact route, the spawn mechanics you need to respect, and how the fight previews the Hero Nay encounter waiting on the other side.
Spider Boss Route and Where to Find the Arena
Spider is one of the six confirmed bosses in the game's badge list, and the community's running difficulty order places it second — right after King Chicken and before the Hero Nay and Hunter Robin pairing. That positioning matters because the route to the spider arena doubles as a tutorial for the longer trek toward Hero Nay's location, and the same terrain hazards show up in both.
Getting to the Western Glade Spawn Point
The arena itself is tucked into a forest clearing on the western edge of the explorable map, just past the second checkpoint tower. According to community data, the fastest path runs from the central hub, north through the orchard ridge, then west along the cliff path that overlooks the river basin. Players who have already cleared King Chicken will recognize the first two thirds of the route — the same fork in the orchard ridge that leads to the chicken coop also branches toward the spider glade if you take the lower trail instead of the upper one.
The spider boss spawn timer is roughly tied to the in-game day-night cycle, so the arena is most reliably active during late afternoon and early evening. A run that starts at the hub after noon usually arrives at the clearing with the boss already loaded in. If you reach the arena and the clearing is empty, the safe move is to wait one full in-game hour at the edge of the glade rather than wandering off — the boss despawns if no player is within proximity for too long, and leaving forces a full timer reset.
What the Arena Looks Like
The spider arena is a circular clearing ringed by tall pines, with webbing strung between the outer trunks that the boss uses as warning markers for area-of-effect attacks. There is a single entrance on the eastern edge and no obvious exit shortcut, which means a wipe sends you all the way back to the orchard ridge. Players who want a cleaner reset should save their checkpoint at the cliff overlook before engaging, because the closest respawn beacon is a two-minute walk back from the arena floor.
| Landmark | Direction from Hub | Approx. Walk Time | Notes |
|---|---|---|---|
| Orchard Ridge fork | Northwest | 1 min | Lower trail = Spider / Hero Nay; upper trail = King Chicken |
| Cliff Overlook checkpoint | West | 2.5 min | Recommended save point before engagement |
| River Basin crossing | Southwest | 3.5 min | Hazard zone — fall damage kills the run |
| Western Glade arena | West | 4 min | Spider and Hero Nay share this region |
The river basin crossing is the single most common run-ender for unprepared players, because the shallow water section hides a slow debuff that stacks if you linger. Crossing the rocks in a straight line, without stopping to fight the minor mobs along the banks, keeps the debuff from capping.
Spider Boss Fight Mechanics and How to Defeat It
Knowing the poly loot spider boss location is only half the work — the arena itself runs a specific attack rotation that punishes players who treat Spider like a generic melee target. Community testing from creators like Chink's Spider Boss walkthrough shows a three-phase fight with clean transitions that you can read off the boss's posture and the webbing on the trees.
Phase 1 — Web Volley
The opening phase is a ranged web volley where Spider hangs from the central pine and fires spread-shot projectiles in a 90-degree cone. The tell is the boss rearing back on its hind legs and the webbing on the surrounding trees glowing white. Players who dodge left or right at the moment the glow peaks avoid the volley cleanly; walking backward does not work because the projectile arc tracks footsteps.
The web volley also applies a slow debuff on hit that lasts around six seconds, and stacking two volleys will root you in place for the follow-up lunge. The clean counter is to bait the volley, dodge sideways, then punish with two melee hits before retreating out of melee range. Doing this rotation three times transitions the boss into Phase 2.
Phase 2 — Web Trap and Summon
Phase 2 is the most punishing window because Spider drops a web trap at the player's feet and summons two spiderlings that rush in from the arena edges. The trap is a telegraphed AoE — the ground beneath your character flashes for about one second before the trap snaps shut, and stepping more than two character-lengths away in any direction avoids it entirely.
| Phase | Boss Behavior | Counter | Duration |
|---|---|---|---|
| Phase 1 | Web volley (90° cone) | Side-dodge, 2 melee hits, retreat | ~45 sec |
| Phase 2 | Web trap + spiderlings | Bait trap, cleave adds, save stamina | ~60 sec |
| Phase 3 | Frantic lunge spam | Stay behind, punish overreach | ~30 sec |
The spiderlings are fragile but distracting, and ignoring them is the most common reason players fail the run. Clearing both adds before re-engaging the boss keeps the arena readable and stops the spiderlings from interrupting your dodge windows during the next volley.
Phase 3 — Enrage Lunge
Once Spider drops below roughly 30 percent health, the boss enters an enrage state where the web volley is replaced by a fast three-hit lunge combo. The lunge chain is short-ranged but hits hard, and the recovery frames are tight enough that a single trade usually costs a third of your health bar. Staying directly behind the boss — between the second and third hind legs — dodges all three lunges and opens a four-hit punish window. This phase ends the fight in about 30 seconds if you can keep the rotation clean.
Preparing for the Hero Nay Encounter Right After
The poly loot hero nay location is just north of the spider arena, separated by a wooden bridge over the upper river fork, and the community treats the two bosses as a paired progression step. Players who clear Spider in under three minutes usually have enough consumables left to push straight into Hero Nay without returning to the hub, which is the most efficient way to bank both badges in a single run.
Hero Nay Location and Arena Entry
Hero Nay patrols a ruined outpost about a minute's walk north of the Western Glade, accessible through the same orchard ridge fork that leads to the spider arena. The outpost is a rectangular courtyard with a raised platform on the northern end where the boss spawns, and the courtyard walls provide natural cover during the opening phase. Like Spider, Hero Nay is tied to the in-game clock and is most reliably active during the same late-afternoon window, which means a clean Spider clear at 4:30 in-game can roll directly into a Hero Nay pull at 4:45.
The full walk between arenas is roughly 90 seconds, and crossing the upper river fork costs no debuff as long as you take the wooden bridge rather than wading through the shallows. The bridge has a 50/50 chance of being guarded by two elite mobs that respawn on the same timer as the bosses, so the standard play is to either sprint across and eat one or two hits, or clear the bridge mobs first if your health is already low from the Spider fight.
How to Beat Hero Nay
Knowing how to beat hero nay poly loot comes down to respecting the boss's ranged-weapon kit and the courtyard's cover system. Hero Nay fights with a repeating crossbow and a short sword, alternating between ranged volleys and close-range slashes depending on the player's distance. Standing behind the courtyard walls during the volley phase is mandatory, because the crossbow shots penetrate light cover and will chunk your health if you peek too early.
The clean opening rotation looks like this: bait two volleys from behind the western wall, dash to the central pillar to bait a slash combo, then punish with three hits before retreating to the eastern wall. Repeating this cycle four times drops Hero Nay into the enrage phase, where the crossbow is replaced by a rapid slash combo that hits for slightly less damage but comes out faster. The enrage rotation punishes greed — stick to two-hit punishes instead of three, and the fight ends cleanly inside the two-minute mark.
| Boss | Pre-fight Setup | Opening Counter | Enrage Phase | Avg. Clear |
|---|---|---|---|---|
| Spider | Save at cliff overlook | Side-dodge web volley | Rear-position lunge punish | 2:30–3:00 |
| Hero Nay | Stock 2 healing consumables | Pillar bait + wall cover | Two-hit punish only | 2:00–2:30 |
| Hunter Robin | 20 arrows minimum | Kite at archery range | Burst during reload | 3:00–3:30 |
Players who want a full ladder view can compare this rotation against the rest of the boss order in the Poly Loot Boss Guide covering all six bosses, which lays out the recommended route from King Chicken through Warden Alder.
Loot Drops, Badges, and Why the Spider Badge Matters
Defeating Spider drops the Spider Badge, which is one of six required for the master boss badge and also unlocks a small but useful stat bonus that stacks with future clears. The drop table is split into common, uncommon, and rare tiers, and the badge itself is a guaranteed drop on the first clear of the week. The other drops — webbing materials, a unique ring, and occasionally a crafting reagent — are randomized per kill but skew toward the rare tier on a weekly reset.
Badge and Drop Table
| Reward | Tier | Drop Rate | Effect |
|---|---|---|---|
| Spider Badge | Guaranteed | 100% (weekly) | Required for master badge, +5% web resistance |
| Glistening Webbing | Common | ~40% per kill | Crafting reagent for ring upgrades |
| Venomfang Ring | Uncommon | ~15% per kill | +8% damage vs. poisoned enemies |
| Silken Thread | Rare | ~5% per kill | Trade-in for the Spider set cosmetic |
The full drop table, including the rare-tier cosmetics that only drop on a clear streak, is documented in the Poly Loot Boss Drops loot tables reference. Players who are farming for the master badge should keep a clean inventory before each run, because the rare drops are a one-per-week-per-character pull and the game does not warn you when the cap resets.
Why the Spider Badge Unlocks Faster Routes
The +5% web resistance from the Spider Badge stacks with the armor set you pick up from King Chicken, and the combined effect is enough to skip one full web volley in the Hero Nay opener. That single saved dodge is the difference between a clean two-minute clear and a messy one where you trade two health potions for damage, so the Spider Badge is genuinely a progression item, not just a checklist check.
Players who are pushing for a fast Hero Nay time should clear Spider first, bank the badge, and then immediately queue into the Hero Nay arena with the stacked resistance bonus. Community data from the Poly Loot Boss Badges unlock guide confirms that the resistance bonus applies retroactively to all spider-web attacks, including the traps in the Spider enrage phase if you choose to refight the boss for rare drops.
Hunter Robin and the Archery Range Encounter
Hunter Robin is the odd one out on the boss ladder because the poly loot hunter robin fight happens at the poly loot archery range rather than a standard enclosed arena. The archery range is a long, open strip on the eastern edge of the map, and the encounter plays as a ranged duel rather than the melee trades you use against Spider or Hero Nay. This is also the point in the ladder where the boss order branches — the community treats Hunter Robin as a paired step with Hero Nay, but mechanically the fights share almost nothing.
Why the Archery Range Changes the Build
The archery range strips away the cover-and-punish rotation that works in the Hero Nay courtyard, because there is no cover at the range. The boss stands at the far target butt and fires a mix of rapid arrows and charged shots, while the player is expected to kite backward down the firing line and land countershots between volleys. The standard melee build used for Spider and Hero Nay is mostly useless here, which is why community guides recommend bringing a minimum of 20 arrows and a bow with at least a 1.2-second draw time for the encounter.
| Stat | Spider Build | Hero Nay Build | Hunter Robin Build |
|---|---|---|---|
| Primary weapon | Sword | Sword + shield | Bow |
| Secondary | Web consumable | Healing potion | Extra arrows |
| Stamina priority | High | Medium | Low |
| Healing slots | 2 | 2 | 1 (only if room) |
The full rotation and equipment swaps are covered in the How to Beat Hunter Robin walkthrough covering the late-game bosses, which also previews the Triple Cobra and Warden Alder fights that round out the ladder. Players who have just cleared Hero Nay and are deciding whether to push straight into Hunter Robin should top off their arrow stock at the hub vendor first, because the archery range has no restock point.
Common Mistakes at the Archery Range
The most common mistake is trying to close distance, which the boss punishes with a charged shot that deals double damage and applies a stagger. The correct spacing is roughly 60% of the range's length — close enough to land consistent countershots, far enough to dodge the charged variant with a single side-step. Players who respect this spacing clear the fight in around three minutes, while players who try to melee usually die in the first 30 seconds.
Frequently Asked Questions
Where exactly is the poly loot spider boss location?
The arena is in the Western Glade, west of the central hub, past the orchard ridge fork and the river basin crossing. The full walk from the hub takes about four minutes, and the closest save point is the cliff overlook roughly 90 seconds before the arena entrance. The boss is most reliably active during the late afternoon in-game window.
How difficult is the Spider boss compared to King Chicken and Hero Nay?
Spider is the second-easiest of the six confirmed bosses, slotted right after King Chicken and well below the Hero Nay and Hunter Robin pairing. The fight has three clean phases, a generous side-dodge window, and a rear-position punish in the enrage phase that makes the rotation forgiving. Expect a clear time of about two and a half to three minutes with a standard melee build.
What is the poly loot hero nay location and how do I reach it efficiently?
Hero Nay is just north of the spider arena, past the upper river fork, in a ruined outpost roughly 90 seconds on foot from the Western Glade. The efficient route clears Spider first, walks north across the wooden bridge, and engages Hero Nay without returning to the hub. Bring two healing consumables and plan to use the courtyard walls as cover during the opening volley phase.
How do I beat Hero Nay on a first attempt without burning resources?
Stick to the pillar-and-wall rotation, bait two crossbow volleys from behind the western wall, dash to the central pillar for the slash punish, and retreat to the eastern wall between cycles. Drop to two-hit punishes instead of three during the enrage slash combo, and the fight ends in roughly two minutes with one healing consumable used.
Does the Spider Badge help with the Hunter Robin fight at the archery range?
The Spider Badge gives +5% web resistance, which does not directly affect the Hunter Robin encounter because the archery range fight is arrow-based rather than web-based. The badge is still worth picking up for the master badge progression and the indirect benefit it provides during the Hero Nay opener. For Hunter Robin specifically, prioritize stocking 20+ arrows and respecting the 60% range spacing.