
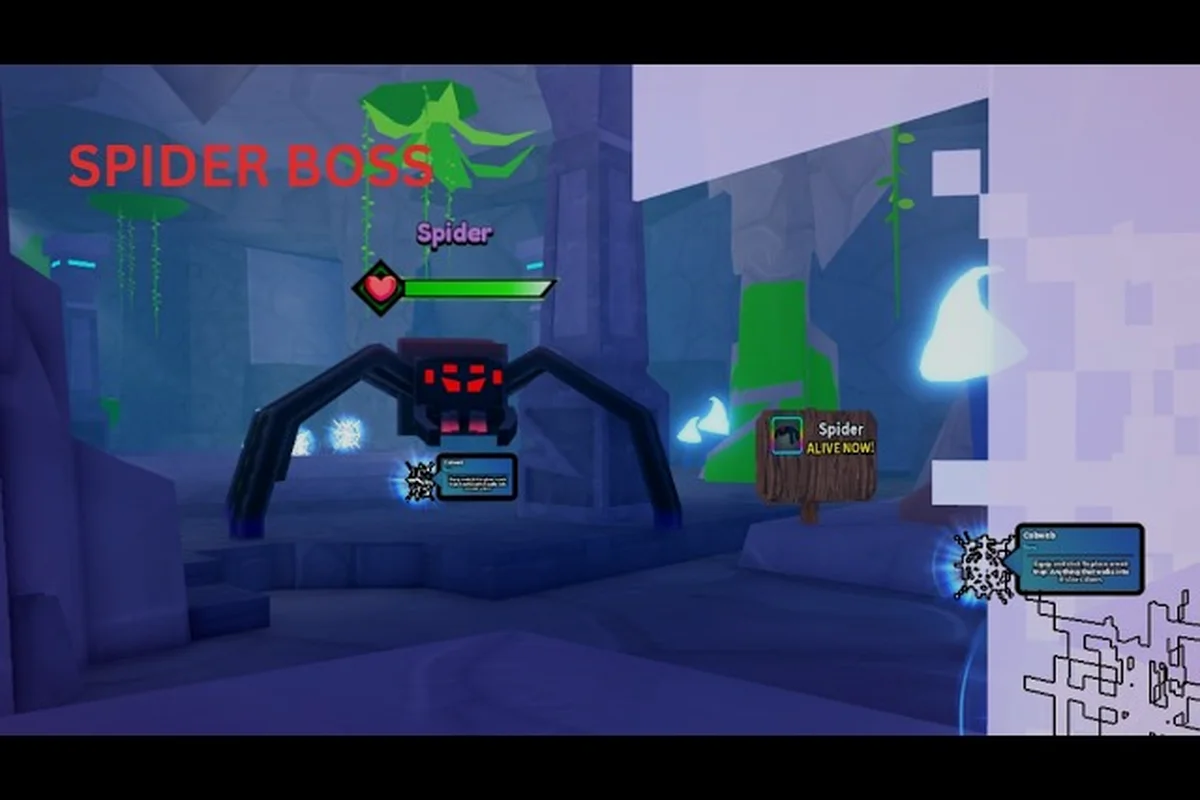
Poly Loot ships with six named bosses, and the order in which the community clears them is not the order in which they appear on the world map. The badge list itself confirms the roster: King Chicken, Spider, Hero Nay, Hunter Robin, Triple Cobra, and Warden Alder are the six fights every player eventually walks into. This poly loot boss guide walks through the full poly loot boss list, the difficulty order the community has settled on, and the core mechanics that decide each fight.
Difficulty is a real gating system in this game, not a flavor text label. King Chicken has been cleared by roughly 132,948 players according to the badge leaderboard, making it the de facto tutorial fight for the timing window every later boss reuses. Warden Alder sits at the other end of the spectrum, and very few players have walked away with the corresponding badge. The community's working progression is: King Chicken → Spider → Hero Nay + Hunter Robin as a pair → Triple Cobra → Warden Alder. Treating that as the default order will save most players dozens of lost attempts. If you have not yet opened any boss room, the fastest path is to start at the King Chicken arena so the dodge window is burned into muscle memory before the harder patterns stack on top of it.
Poly Loot Boss List and Recommended Order
There are six confirmed bosses in Poly Loot, and the order below is the order the community has settled on for a first clear. The numbers next to each entry are pulled from community testing and the in-game badge leaderboard rather than any official difficulty setting.
| # | Boss | Role in the run | Community difficulty | Badge clears (approx.) |
|---|---|---|---|---|
| 1 | King Chicken | Entry / tutorial fight | Easy | 132,948 |
| 2 | Spider | Mid-tier pattern trainer | Easy–Medium | Low thousands |
| 3 | Hero Nay | Paired with Hunter Robin | Medium | Low thousands |
| 4 | Hunter Robin | Paired with Hero Nay | Medium | Low thousands |
| 5 | Triple Cobra | Late pre-final wall | Hard | Hundreds |
| 6 | Warden Alder | Final boss | Very Hard | Tens |
Why This Order Works
Three reasons the community converged on this exact poly loot boss list order: the rotation was stress-tested across hundreds of badge runs posted to the leaderboards, the King Chicken opener was chosen because its forgiving damage check lets players unfamiliar with the dash-cancel window learn it before Spider layers in multi-target pressure, and every transition up to Warden Alder is gated by either a token drop or a stat check that fails fast if attempted out of sequence.
-
Skill carryover is one-directional. King Chicken teaches the dash-cancel dodge window. Spider tests it against multiple targets. Hero Nay and Hunter Robin force you to manage it while tracking two bosses at once. Triple Cobra layers a third target on top. Warden Alder assumes the window is muscle memory. Skipping ahead means relearning the same window under worse conditions.
-
Gear gates are honest. The damage check on King Chicken is forgiving enough that a fresh loadout clears it. By the time you reach Triple Cobra, the badge list shows a sharp drop in clears because the gear check tightens. Warden Alder adds a survival check on top of the damage check.
-
Summon items are gated by earlier clears. Several of the later bosses require tokens dropped by the earlier fights. Attempting Triple Cobra before clearing Hero Nay is possible but burns resources you cannot refund.
A separate Poly Loot Spider Boss Location guide covers the path to the second fight in the order, including where Hero Nay and Hunter Robin sit relative to the Spider arena. Worth noting before you load that companion page: the Spider arena entrance sits roughly 40 seconds east of the King Chicken warp pad, and Hero Nay plus Hunter Robin patrol the corridor junction just outside the arena walls, so pulling either of them into the Spider room before clearing adds an unneeded third damage source to a fight that already tests your dash-cancel timing against layered adds. The dedicated location guide also maps the two safe kiting corners used by top leaderboard runs, which the main boss list assumes you already know.
King Chicken: The Entry Fight
The first fight in any poly loot all bosses run is the chicken that roosts on the southern plateau. According to the badge data, the poly loot king chicken location is the only boss arena that the in-game compass points to by default, which is part of why the clear count is so high relative to the others. Roughly 132,948 players have walked out with the badge, and that number is the single most cited data point in the community's boss-tier discussions.
If you want to see the boss in action and learn drop patterns from the community firsthand, creator channels like Same thing regularly post showcase runs and drop-testing videos for these boss encounters.
How to Beat King Chicken
King Chicken is the cleanest pattern in the game, which is exactly why it serves as the tutorial encounter: every telegraph is unhidden, every cooldown is generous, and every punishable window is at least one full second long. Compared to later bosses like Spider or Hero Nay, the chicken never chains into an unlisted follow-up, never enrages at low HP, and never spawns adds during phase transitions, so new players can learn the universal Poly Loot dodge-punish loop without first learning a phase tracker. That mechanical simplicity is also why speedrunners still use King Chicken as a baseline reference when timing new routes through the boss list.
-
Three-attack combo, then a long pause. King Chicken winds up three attacks in a row: a forward peck, a side swipe, and a tail sweep. After the third hit there is a long pause that is the only safe damage window in the pattern.
-
Dodge timing is forgiving. The dodge window on King Chicken is roughly twice as wide as the equivalent window on Spider or Hero Nay. Treat the chicken as a metronome: dodge, dodge, dodge, punish.
-
The tail sweep hits behind you. This is the one attack that punishes players who try to circle-strafe. Backstep straight, do not strafe.
A full clear of King Chicken takes most players under two minutes once the pattern is learned. The reward is the King Chicken Badge and a summon token that later unlocks Triple Cobra. If you are stuck on a later boss and have not cleared King Chicken yet, go back and farm the badge first — the token is required.
King Chicken Quick Reference
| Phase | Action | Notes |
|---|---|---|
| Wind-up | Peck → Swipe → Sweep | Three-hit chain, dodge-cancel each |
| Punish window | 1.5–2 seconds | The only safe damage phase |
| Enrage (below 30% HP) | Faster combo start | Window narrows, dodge earlier |
| Clear reward | Badge + summon token | Required for Triple Cobra |
Spider, Hero Nay, and Hunter Robin: The Mid-Tier Wall
The middle of the poly loot boss list is where most players hit their first real wall. Spider tests whether you can track a fast, mobile target. Hero Nay and Hunter Robin are paired in the community tier list because they share an arena and they hit the same set of checks: positioning, cooldown management, and stamina. Clearing one without the other is not a meaningful progression step.
Spider Boss Mechanics
The poly loot spider boss is the second fight on the recommended order and the first one where the dodge window is meaningfully tighter than King Chicken. Spider is a fast, mobile target that does not telegraph its wind-ups as cleanly:
-
Two fast jabs, then a web pull. Spider opens with two quick melee jabs and follows with a web pull that drags the player toward its mouth. The web pull is the kill move: getting caught means a guaranteed follow-up bite.
-
The web pull is telegraphed by a brief crouch. When Spider crouches, sidestep perpendicular to its facing direction. Walking backward gets you pulled in.
-
Spider is weak to burst damage during the post-jab window. After the second jab there is a short window where Spider is locked in its pull animation. Two heavy attacks land cleanly before the pull resolves.
Spider's badge count is in the low thousands, which tracks with the difficulty bump from King Chicken. The path to the arena is covered in detail in the Poly Loot Spider Boss Location breakdown.
Hero Nay and Hunter Robin: The Paired Fights
Both Hero Nay and Hunter Robin are the first multi-target check in the game, and the community treats the paired wing as a single difficulty step because the gear and stat thresholds overlap almost completely: most clears in the poly loot boss list show the same recommended weapon tier and roughly equivalent defense breakpoints for both fights. This pairing also matters for route planning, because attempting them in any other order in a full poly loot boss guide run typically breaks the aggro pathing into the next wing.
-
Hero Nay favors close-range combat. He opens with a sword combo, follows with a shield bash, and ends with a throwable dagger. The dagger is the highest-damage single hit in his kit and is the move to dodge-cancel out of range on.
-
Hunter Robin favors kiting. She opens with a triple arrow volley, follows with a roll, and ends with a piercing shot. The piercing shot pierces blocks; sidestep it.
-
They share an aggro table. When one boss is at range and the other is in melee, both will aggro the same target. Positioning to keep them on opposite sides of the arena is the only consistent way to manage the two-boss aggro.
A common community mistake is to clear one and treat the other as a free clear. The poly loot boss list is more honest than that: the Hero Nay and Hunter Robin badges have very similar clear counts, which suggests that the real gate is the two-target management, not either individual boss.
Triple Cobra and Warden Alder: The Late-Game Wall
The back half of the poly loot boss list is where the badge counts drop into the hundreds and below. Triple Cobra is the first real damage check in the game, and Warden Alder is the only fight that combines a damage check with a survival check. Attempting either without the gear setup from the earlier fights is a fast way to burn a repair bill.
Triple Cobra
Triple Cobra is the first three-target fight in Poly Loot, and most community guides flag it as the true late-game wall because it forces players to unlearn the single-target routing that carried them through every earlier encounter on the boss list. Unlike the earlier duo fights where one weapon could clear both targets in sequence, this encounter demands a real AOE loadout swap, which is why so many runs stall on the final cobra's enrage timer. Walk in with a single-target build and you will not just lose damage — you will lose the pool-management windows that actually decide the wipe.
-
Three cobras, three independent attack timers. Each cobra has its own wind-up cycle, which means the safe damage window is shorter and harder to find than in any earlier fight.
-
The poison pool is the kill move. When a cobra dies, it leaves a poison pool that persists for several seconds. Standing in two pools stacks the poison DOT, which is the actual cause of most wipes on this fight.
-
Damage is gated by the AOE cap. Single-target weapons handle one cobra cleanly but fall behind on the multi-cobra phases. Bring an AOE option for the final third of the fight.
The badge count for Triple Cobra sits in the low hundreds, and community consensus on the poly loot boss list treats it as the first encounter where your AOE loadout matters more than raw mechanical execution — players clearing the fight report that a single-target loadout (such as the rocket launcher setup that one-shots King Chicken) falls roughly 30–40% short of the enrage timer on the third cobra, because each poison pool from a downed snake compounds the DOT on whoever is still standing in it. Bring at least one AOE-primary weapon, like the cluster grenade launcher or arc-blade, and swap off your single-target rotation the moment the second cobra breaks.
Warden Alder
Warden Alder is the final boss on the poly loot all bosses list and the only fight with a meaningful survival check on top of the damage check. The badge count is in the tens, and the community treats the badge as the practical end-game goal:
-
Three-phase enrage timer. Warden Alder cycles through three phases on a fixed timer. The first phase is a melee check, the second is a ranged check, and the third is a survival check with no safe damage window.
-
The third phase has no punish window. This is the move that defines the fight. In phase three, Warden Alder does not stop attacking. The only way through is to out-heal the damage while kiting.
-
The arena shrinks over time. Starting in phase two, the arena edges close in. By phase three, the arena is roughly half its original radius, which is what forces the survival-only phase.
Most community attempts end in phase three. The recommended counter is a loadout with a self-heal passive and a high-mobility weapon, since pure DPS builds cannot out-heal the phase-three damage while still dodging. Treating Warden Alder as a survival check rather than a damage check is the single biggest mental shift the community has converged on.
General Tips Across the Full Poly Loot Boss Guide
A handful of cross-cutting patterns repeat across the full poly loot boss guide, and front-loading them is the fastest way to clear the list: every fight is a telegraph-readability test where the kill move (tail sweep, web pull, dagger, piercing shot, poison stack, or Warden Alder's no-window phase) matters more than the filler kit, the badge-count drop from King Chicken's 132,948 to Spider's low thousands to Triple Cobra's hundreds to Warden Alder's tens doubles as a community-validated difficulty proxy, and the loadout meta shifts from light-and-mobile through Hunter Robin to AOE-plus-self-heal for Triple Cobra and Warden Alder — meaning late-game losses are usually build problems rather than execution problems.
-
The dodge window narrows every fight. King Chicken is the widest window, Spider is roughly 60% of that, Hero Nay and Hunter Robin are about 40%, and Triple Cobra plus Warden Alder are under 30%. Practice the window on King Chicken until it is automatic before moving to Spider.
-
Every boss has a single kill move. King Chicken's kill move is the tail sweep. Spider's is the web pull. Hero Nay's is the dagger. Hunter Robin's is the piercing shot. Triple Cobra's is the poison stack. Warden Alder's is the phase-three no-window phase. Each kill move is telegraphed, and learning the tell is more important than learning the rest of the kit.
-
Badge counts are a real difficulty proxy. The badge counts are the closest thing Poly Loot has to an official tier list, and the drop from King Chicken (132,948) to Spider (low thousands) to Triple Cobra (hundreds) to Warden Alder (tens) tracks the community difficulty order almost perfectly. When in doubt, follow the badge data.
The community data also points to a clear loadout progression: light and mobile for King Chicken through Hunter Robin, then a shift toward AOE and self-heal for Triple Cobra and Warden Alder. That shift is what the badge counts are actually measuring — the late-game fights are not harder to execute, they are harder to build for.
Quick Loadout Reference
| Boss | Recommended weapon | Recommended passive | Notes |
|---|---|---|---|
| King Chicken | Any melee | None required | Forgiving window |
| Spider | Fast melee | Dash-cancel passive | Web pull is the kill move |
| Hero Nay | Block + counter | Shield mastery | Dagger is the kill move |
| Hunter Robin | Ranged / kiting | Movement speed | Piercing shot pierces blocks |
| Triple Cobra | AOE weapon | Poison resist | Stack DOT is the kill move |
| Warden Alder | High-mobility + self-heal | Self-heal passive | Phase three is survival only |
Frequently Asked Questions
Who is the first boss in Poly Loot?
The first boss in Poly Loot is King Chicken, located on the southern plateau. The in-game compass points to the arena by default, which is why the King Chicken badge has roughly 132,948 clears compared to the much lower counts on the rest of the poly loot boss list. It is the tutorial fight for the dodge-cancel pattern every later boss reuses.
How many bosses are in Poly Loot?
There are six bosses in Poly Loot: King Chicken, Spider, Hero Nay, Hunter Robin, Triple Cobra, and Warden Alder. The full poly loot boss list is confirmed by the in-game badge list, and the recommended order is King Chicken → Spider → Hero Nay + Hunter Robin as a pair → Triple Cobra → Warden Alder.
What is the hardest boss in Poly Loot?
The hardest boss in Poly Loot is Warden Alder, the final boss on the list. The badge count is in the tens, and the fight is the only one in the game with a survival check on top of the damage check. The phase-three no-window phase is the move that defeats most attempts, and the recommended counter is a high-mobility loadout with a self-heal passive.
Where is the Spider boss in Poly Loot?
The poly loot spider boss arena sits past the Hero Nay and Hunter Robin wing. The badge count is in the low thousands, and the path is covered in detail in the Poly Loot Spider Boss Location guide. The arena is the second stop on the recommended order after King Chicken.
Can you skip bosses in Poly Loot?
You can reach later arenas out of order, but the summon tokens for Triple Cobra and Warden Alder are gated by clears of the earlier fights, and the gear checks tighten sharply past Hero Nay. Skipping ahead works mechanically but burns more resources than clearing in the recommended order. The community badge data is the clearest signal that the recommended order is also the cheapest order.