
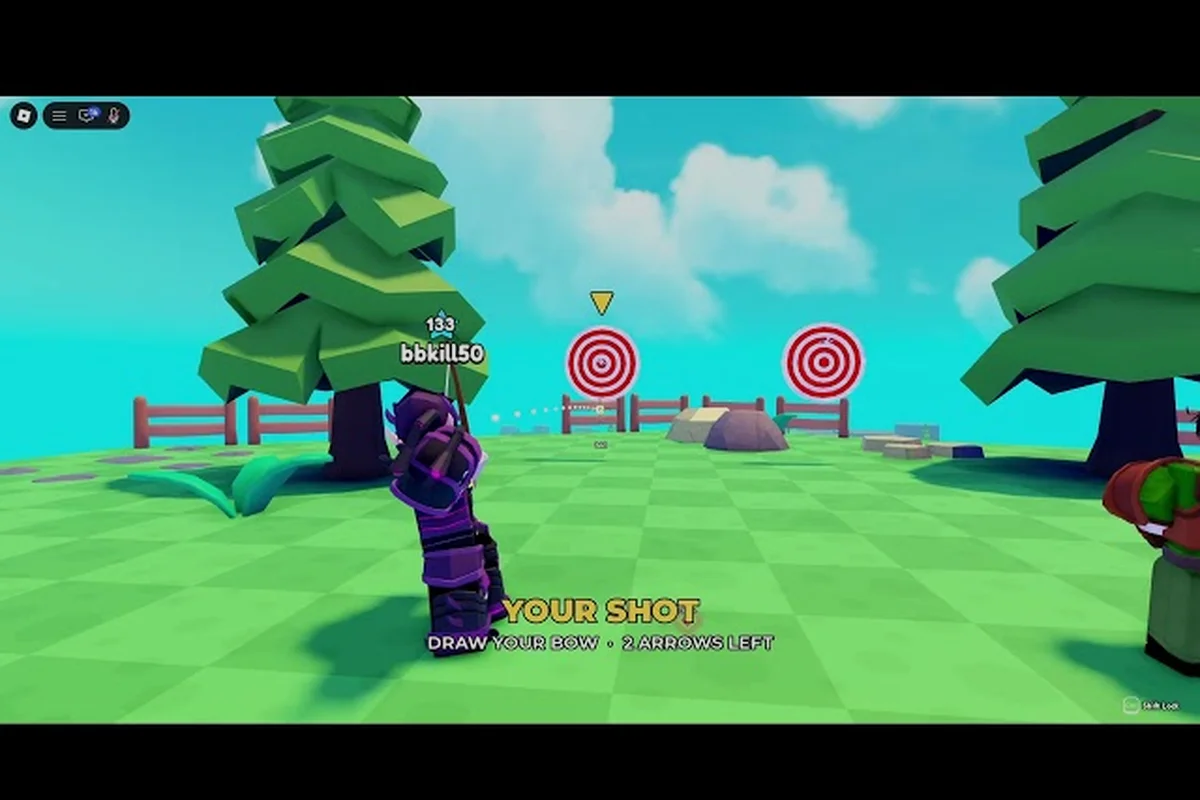
The six confirmed bosses in Poly Loot split into two very different design buckets. King Chicken, Spider, and Hero Nay are brawlers — you trade hits at melee range inside a standard arena. Hunter Robin, Triple Cobra, and Warden Alder are the three archer encounters, and they play out across open terrain where positioning matters more than swing timing. Players trying to figure out how to beat Hunter Robin Poly Loot bosses usually hit a wall on the same two mechanics: the archer fires faster than a melee boss telegraphs, and the arena gives you nowhere to corner her.
The archer trio lives at the harder end of the community ladder, with Hunter Robin sitting in the middle, Triple Cobra one tier up, and Warden Alder as the final check. The community video how to easily beat archer robin in polyloot confirms that the six bosses listed in the badge menu run King Chicken → Spider → Hero Nay / Hunter Robin (paired difficulty) → Triple Cobra → Warden Alder. That ordering lines up with what most players report on the ladder, so a clear read on the three archers makes the back half of the badge grind much smoother.
Hunter Robin Fight Overview and Pre-Match Setup
Hunter Robin is fought at the archery range, not a standard enclosed arena, which is the single biggest reason she trips up players who already cleared King Chicken and Spider. According to community video guides, the fight plays out as a pure ranged duel: Robin keeps her distance, fires in volleys, and uses the long lane of the range to control where you can stand. There is no melee trade window the way you get with Hero Nay, so muscle memory from the early bosses will actively work against you here.
How to Reach the Archery Range
Hunter Robin's location is the archery range sitting outside the main village ring, slightly elevated above the path that leads to the King Chicken arena. The path forks after the Spider arena: a left branch climbs toward the Hero Nay ruin, while a right branch skirts a rock face and dead-ends at the range entrance. Players report that an NPC archer practices near the entrance during daytime hours, which doubles as a soft tutorial for the volley timing Robin uses inside the fight. The path has two ambush points — a bandit on the lower switchback and a stray elemental near the top stairs — so clearing those before queuing the boss stops a surprise pull from ruining your opening stance.
Pre-Fight Loadout Choices
The bow you bring matters more than your melee weapon for this fight. Community testing reported by players suggests a Bamboo Longbow is the safest starter pick because its draw time is short enough to interrupt Robin's volleys without burning all your stamina. Players who push the fight with a higher-damage Iron Recurve report faster clear times, but the slower draw means you eat at least one extra arrow before your first shot lands. For armor, light gear is preferred over heavy plate: the Padded Ranger Coat and Trail Boots combo gives enough mitigation to survive a stray arrow while keeping your dodge roll uncrippled. Heavy armor makes the volley windows feel survivable, but the stamina penalty means you cannot roll-cancel a charged shot, which is the actual win condition.
| Loadout Slot | Safe Pick (Beginner) | Aggressive Pick (Speedrun) | Trade-Off |
|---|---|---|---|
| Bow | Bamboo Longbow | Iron Recurve | Draw speed vs. damage per arrow |
| Armor | Padded Ranger Coat | Hunter's Leather | Stamina cost vs. arrow mitigation |
| Boots | Trail Boots | Windrunner Moccasins | Ground traction vs. roll distance |
| Trinket | Whistle Charm | Crow Feather | Early-call safety vs. dodge window |
| Consumable | 3x Apple, 1x Bandage | 5x Apple, 0x Bandage | Heal-over-time vs. burst emergency |
Hunter Robin Phase Breakdown
The fight has three observable phases based on her remaining health, and the phase transition is signposted by Robin stepping back and shouting a line. Phase 1 (100% to 65% HP) is a steady volley — three arrows in a horizontal spread, then a one-second pause. Phase 2 (65% to 30% HP) adds a poison-tipped arrow to every third volley, which chips stamina on top of HP and punishes players who try to facetank. Phase 3 (30% to 0% HP) drops the volley cadence to two arrows per shot but increases the draw speed, so dodging gets harder even though incoming damage goes down. Community reports flag Phase 2 as the most common wipe point because the poison arrow stacks with regular damage and players stop dodging once they feel comfortable.
Triple Cobra Encounter and Triple Cobra Location
Triple Cobra is the second archer boss on the ladder, and players who just learned how to beat Hunter Robin Poly Loot style will notice the jump in pressure immediately. Where Robin relied on a steady volley you could read after one cycle, Triple Cobra fires from three overlapping angles and rotates position between volleys. The fight rewards the same positioning fundamentals you learned at the archery range, but it punishes any habit of standing still to line up a shot.
Where to Find Triple Cobra
The Triple Cobra location is a small canyon bowl north of the archery range, accessible by a narrow footpath that branches off the main road past Robin's arena. The path is short but it dips through a patch of brush that hides two casters and a single melee bruiser, so first-time visitors usually take a chunk of chip damage before reaching the entrance marker. According to the community channel Vortex Shadow, the bowl is open-topped, which is good for sightlines and bad for cover — once the fight starts, there is nowhere to hide between volleys.
How to Beat Triple Cobra
To beat Triple Cobra, the core trick is to treat the three archers as a single threat with three guns, not three separate targets. Killing one early feels like progress, but the remaining two gain a damage buff that turns the next volley lethal, so even burst-DPS players report that focusing all three down at once is faster than picking them apart. The opening stance should put a rock outcropping between you and the center archer — that breaks the line of sight for the cross-fire and gives you a clean shot at the flankers.
| Phase | HP Threshold | Cobra Behavior | Player Counter |
|---|---|---|---|
| Phase 1 | 100%–60% | Volley in a triangle spread, 2-second pause | Dodge through the center gap, punish the pause |
| Phase 2 | 60%–25% | Adds a poison arrow, increases draw speed | Stay near cover, trade one arrow for two of your own |
| Phase 3 | 25%–0% | All three fire simultaneously, no pause | Roll-cancel every shot, never stand still |
The position of each cobra matters more than your weapon. Community testing reports the left archer is the most exposed because her perch is lower than the others, so a player who leans left on the opening pull gets a clean arrow into her chest before the cross-fire resolves. The right archer sits behind a wooden post that blocks about a third of incoming arrows, which makes her the safest target during Phase 2 when the poison arrow starts flying. The center archer is the kill priority once you have the rhythm, because killing her collapses the triangle and turns the remaining two into a much more readable pair.
Common Mistakes Against Triple Cobra
Players new to the archer trio often carry the muscle memory of Hero Nay, where baiting one big swing and punishing it is the right read. That pattern does not work here because none of the three Cobras will commit to a single telegraphed attack — they all shoot in volleys, and the pause windows shrink as the fight goes on. Another frequent mistake is trying to climb the canyon wall for high ground. The bowl is open-topped, but the wall is too steep to mantle, so the time you spend jumping usually lines up with a poison arrow to the back. Staying on the canyon floor near the rock outcropping keeps your dodge arc short and your aim consistent.
Warden Alder and Warden Alder Location
Warden Alder is the final boss on the badge list and the hardest of the three archers. Community reports describe the fight as a stress test for everything the player learned at the Robin and Triple Cobra fights: positioning, volley reading, and stamina management all get checked at once. Players who can clear Triple Cobra without burning more than one consumable are usually ready for Warden Alder, but players who limp into the fight on half-stamina will find the back half of the encounter unplayable.
Warden Alder Location and Entry
The Warden Alder location is the watchtower at the highest point on the map, accessible by a long switchback path that starts behind the village smithy. The path is unguarded, but it is steep, and falling off the edge sends the player back to the last checkpoint with a chunk of HP missing. The community channel Same thing confirms the tower exterior has a small plaza where the boss intro cutscene plays, and the plaza is also where the arena boundary is set. Once the cutscene ends, the player cannot leave the plaza without dying and restarting, so any consumables or arrow restocks need to happen on the switchback before queuing the fight.
How to Beat Warden Alder
To beat Warden Alder, the single most important read is that he switches between bow and a one-handed axe mid-fight, and the axe combo is the only melee attack any of the three archers uses. Players who try to play the entire encounter at range get hit by the axe combo the first time he closes distance and lose the rhythm. Players who try to play the entire encounter at melee get pelted by charged arrows between axe swings and run out of stamina before Phase 2.
| Phase | HP Threshold | Warden Behavior | Recommended Response |
|---|---|---|---|
| Phase 1 | 100%–70% | Charged bow shots, slow draw, long pause | Stay mid-range, punish every draw |
| Phase 2 | 70%–35% | Mixes axe combos into bow volleys | Bait the axe, dodge back, punish with two arrows |
| Phase 3 | 35%–0% | Rapid bow shots, no pause, dash closes distance | Roll-cancel every shot, save stamina for the dash punish |
The axe combo is the cleanest damage window in the entire fight. It opens with a horizontal swing that hits a full 180 degrees, then a vertical overhead that hits directly in front. Players who bait the horizontal and roll-cancel through the vertical end up behind Warden Alder with a free three-arrow burst to the back. The community video that walks through the archer trio in detail highlights this as the only consistent punish window once Phase 2 starts, because the bow volleys in Phase 2 do not have a long enough pause to land a charged shot.
Recommended Loadout for Warden Alder
Warden Alder is the only one of the three archers where a high-damage bow pulls ahead of a fast-draw bow. The Iron Recurve is the community favorite because the axe punish window is wide enough to land a fully charged shot, and the extra damage per arrow cuts the fight length by about twenty seconds. Light armor still wins over heavy armor, but the Hunter's Leather set is preferred here because it has a small damage reduction bonus against arrows that the Padded Ranger Coat does not. Trinket choice matters more for this fight than the other two: the Crow Feather is the safer pick because the extra dodge window gives you one more roll to escape Phase 3's rapid fire.
| Slot | Recommended Pick | Why It Matters |
|---|---|---|
| Bow | Iron Recurve | Charged shot damage fits the axe punish window |
| Armor | Hunter's Leather | Built-in arrow damage reduction |
| Boots | Windrunner Moccasins | Longer roll distance covers the Phase 3 dash |
| Trinket | Crow Feather | Extra dodge window for rapid fire |
| Consumable | 4x Apple, 2x Bandage | Bandages cover the axe combo chip damage |
Comparing the Three Archer Bosses
The three archer fights share a positioning-focused design philosophy, but the difficulty curve between them is steeper than the gap between King Chicken and Spider. Hunter Robin is the tutorial, Triple Cobra is the test, and Warden Alder is the final check. A player who can clear all three with full consumables and no wipes has demonstrated mastery of the ranged combat system, and the badge menu reflects that by listing Warden Alder last on the confirmed list.
| Mechanic | Hunter Robin | Triple Cobra | Warden Alder |
|---|---|---|---|
| Arena Type | Open lane | Canyon bowl | Tower plaza |
| Ranged Pressure | Steady volley | Triangle cross-fire | Rapid charged shots |
| Melee Threat | None | None | Axe combo in Phase 2/3 |
| Recommended Bow | Bamboo Longbow | Bamboo Longbow | Iron Recurve |
| Best Cover | Lane edges | Rock outcropping | Tower pillars |
| Common Wipe Cause | Poison arrow chip damage | Cross-fire overlap | Phase 3 stamina drain |
| Difficulty Tier | Mid | High | Final |
Players who have already cleared the early ladder should look at the Poly Loot boss guide for the full ordering of all six bosses and how the archer trio fits into the larger badge grind. The guide is a useful reference for players who want to plan their consumable runs across multiple bosses in one session.
Why the Archer Trio Feels Different
The early bosses reward aggression. King Chicken punishes you for backing off, Spider punishes you for hesitation, and Hero Nay punishes you for missing a dodge. The archer trio flips that script: aggression gets you killed because every one of the three fights has a longer punish window than the early bosses, and the punishes hit harder. Learning to wait, read the volley, and punish only when the opening is clean is the core skill the archer trio teaches, and that skill carries into the rest of the game's harder content.
Build Synergies Across the Three Fights
The Bamboo Longbow is the only weapon that works well across all three fights, which makes it a smart crafting priority before starting the archer ladder. The Iron Recurve is better for Warden Alder but worse for Hunter Robin, so the optimal play is to clear Robin and Triple Cobra with the Bamboo Longbow and then switch to the Iron Recurve for the final fight. Armor is more consistent: the Padded Ranger Coat works for all three, while the Hunter's Leather is a strict upgrade for Warden Alder. Trinkets are the most flexible slot, and players report that swapping the Whistle Charm for the Crow Feather before the Warden Alder fight is the single biggest quality-of-life improvement on the back half of the ladder.
Frequently Asked Questions
Where is the Triple Cobra location in Poly Loot?
The Triple Cobra location is a canyon bowl north of the archery range, reached by a short footpath past Hunter Robin's arena. The bowl is open-topped with a single rock outcropping in the center, and the path in has two caster mobs in the brush. Players who learned how to beat Triple Cobra Poly Loot style usually clear the brush mobs first to avoid getting pulled into the fight undergeared.
What is the easiest way to beat Warden Alder in Poly Loot?
The easiest way to beat Warden Alder is to bait the axe combo in Phase 2 and roll-cancel through the vertical swing for a free three-arrow burst to the back. Players who try to play the whole fight at range run out of stamina in Phase 3, so the recommended pattern is mid-range bow shots until the axe combo starts, then a single dodge-punish cycle. Bring two bandages for the axe chip damage and the fight ends cleanly.
Can I skip Hunter Robin and go straight to Triple Cobra?
No, the badge menu locks each boss behind the previous clear, and the game forces Hunter Robin first among the archer trio. Players who try to bypass the archery range find the path to Triple Cobra gated by a Robin-clear flag. The good news is that learning how to beat Hunter Robin Poly Loot style teaches the volley-reading fundamentals that Triple Cobra and Warden Alder both rely on, so the fight is worth the time even for experienced players.
Which bow is best for the entire archer trio?
The Bamboo Longbow is the best all-around bow for Hunter Robin and Triple Cobra, while the Iron Recurve pulls ahead for Warden Alder. A common speedrun pattern is to craft both bows, clear Robin and Triple Cobra with the Bamboo Longbow for the draw speed advantage, and then swap to the Iron Recurve for the Warden Alder fight to take advantage of the longer punish windows. Stamina management is the deciding factor: faster bows let you shoot more often, but slower bows let each arrow count more.
How many attempts does the average player need for the archer trio?
Community data reported by players suggests the average first-time clear count is around 4 attempts for Hunter Robin, 6 for Triple Cobra, and 8 for Warden Alder, though experienced players who already cleared Hero Nay often shave two attempts off each. The biggest wipe cause across all three fights is Phase 2 stamina drain, which is why the Padded Ranger Coat and Trail Boots combo is recommended for the first clear attempt on each boss.