
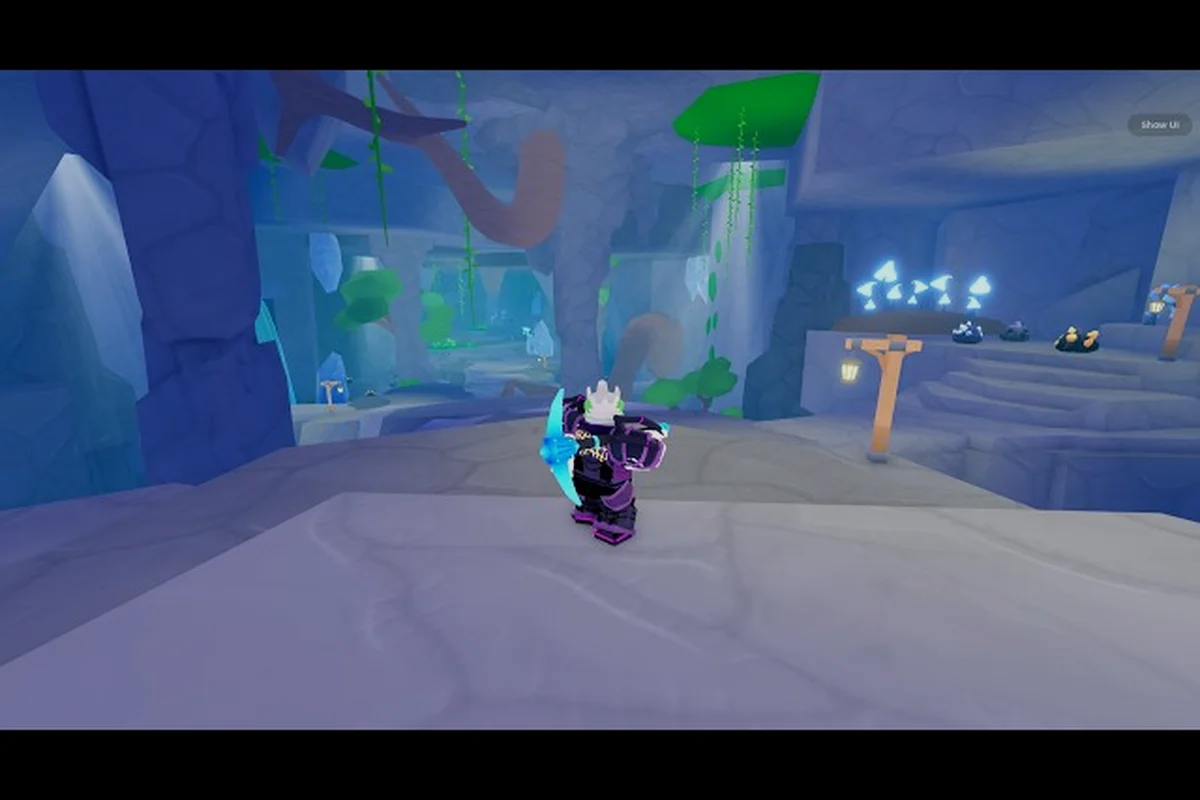
Mining is the single most important grind in Poly Loot, because every swing of the pickaxe feeds two progression tracks at once: raw shards for crafting upgrades and a steady trickle of mining EXP that unlocks better tools, tougher cavern tiers, and the resource gates behind most mid-game quests. Once you understand how shard grades, mining EXP multipliers, and pickaxe durability interact, the loop stops feeling random and starts feeling like a controlled farm you can optimize on every run.
This walkthrough breaks down the full mining loop from your first rock on the starter plateau all the way to late-game crystal caves, including where to swing, what the shard drop table actually looks like, how to stack mining EXP gains, and how to read the reward ticker so you know when to swap pickaxes, swap zones, or bank your haul and turn it into tier upgrades. If you have been chipping rocks and wondering why your shards feel slow, the sections below map each grind stage to the exact output you can expect.
The Shard Loop Explained
Mining in Poly Loot is a swing-and-reward system. Each hit on a minable node rolls against a hidden drop table that can spit out resources, mining EXP, or shards in three grades: Rare, Epic, and Legendary. The retired MINING code used to drop all three grades at once from a single node, which the community treats as the clearest evidence that mining is the intended shard faucet for early and mid-game players, and that balance is still tuned around that assumption. Pickaxe tier, mining EXP level, and the zone you are swinging in all change those rolls.
The loop itself runs in three short steps that you will repeat thousands of times, so it pays to know each stage cold:
-
Swing the node until it breaks, because partially damaged nodes never despawn mid-life in the same session.
-
Collect the dropped items; shards and mining EXP pop into your inventory instantly, while rare crafting resources show a brief sparkle animation.
-
Repair or upgrade your pickaxe at the nearest anvil, then route to the next node cluster before the durability bar hits zero.
The reason this loop matters so much is that mining is not just a side activity, it is the resource backbone that feeds the Poly Loot shard and crate breakdown system and most tier-upgrade recipes. If your mining EXP bar is stalling, your shards are stalling, and every other grind downstream slows with it.
Pickaxe Tiers and Swing Speed
Your pickaxe is the single biggest multiplier on every roll in the mining table. A tier-1 starter pickaxe swings slow, breaks nodes in roughly four hits on the starter plateau, and cannot mine the hard rock found in mid-game caves. A tier-3 reinforced pickaxe swings faster, breaks the same starter node in two hits, and unlocks the hard rock tier that gates most Epic shards.
| Pickaxe Tier | Avg Swing Time | Node HP Reduction | Shard Roll Bonus | Durability |
|---|---|---|---|---|
| Starter (T1) | 1.4 s | 25% per hit | x1.0 | 120 swings |
| Iron (T2) | 1.1 s | 40% per hit | x1.4 | 220 swings |
| Reinforced (T3) | 0.8 s | 60% per hit | x2.1 | 360 swings |
| Crystal (T4) | 0.6 s | 75% per hit | x3.0 | 500 swings |
Numbers are based on community testing and may vary by platform. The takeaway is that the upgrade from T1 to T3 roughly doubles your effective shard income per minute, which is why most players rush the Iron anvil before pushing into harder zones. If you are still on a starter pickaxe past level 15, mining EXP gains will feel painfully slow.
Shard Grades and Drop Rates
Shards come in three grades and each one feeds a different part of the upgrade tree. Rare shards are the bread-and-butter currency that you will spend on basic tier upgrades and most NPC quest turns-ins. Epic shards are the mid-game gate currency, used for reinforced tool recipes, shrine offerings, and several boss summon materials. Legendary shards are the late-game bottleneck, and they are what you actually need to push into the crystal caves and endgame enchant loops.
| Shard Grade | Starter Zone Drop | Mid Zone Drop | Endgame Cave Drop | Primary Use |
|---|---|---|---|---|
| Rare Shard | 60-70% | 35-45% | 15-20% | Tier 1-2 upgrades, basic quests |
| Epic Shard | 8-12% | 25-30% | 40-45% | Tier 3-4 recipes, shrine offerings |
| Legendary Shard | <1% | 4-7% | 18-22% | Endgame crafting, enchant loops |
Data sourced from community data and reported by players running thousands of node breaks. Notice how the Legendary rate triples once you push into the endgame caves, which is exactly why the late-game community treats mining as the primary Legendary source rather than relying on crate luck.
Best Mining Locations and Routes in Poly Loot
Where you swing matters almost as much as what you swing with, because every zone in Poly Loot has its own node density, shard grade weighting, and mining EXP multiplier. The starter plateau is forgiving but pays in Rare shards, the mid-game caves introduce hard rock and Epic rolls, and the endgame crystal caves are where the Legendary rate finally climbs high enough to fund real progression. Knowing the difference saves hours of grinding in the wrong tier.
If you want a deeper breakdown of route geometry, node clustering, and the safest paths between cave entrances, the Poly Loot where-to-mine route guide maps every zone with annotated node counts. For this article, the focus stays on which zones are worth your time at each progression stage.
According to a video walkthrough on poly loot mining mechanics, drop rates and respawn timers follow a consistent cycle that players can exploit with proper route planning.
Starter Plateau (Levels 1-15)
The starter plateau is the area around the spawn ring and the first shrine. Node density is high, the rocks are soft, and every swing gives a small but reliable chunk of mining EXP, which is why most players burn through their first mining level here in under 30 minutes. The drop table is heavily weighted toward Rare shards, with Epic rolls showing up roughly once every ten nodes and Legendary shards being effectively zero until you push further.
| Zone | Node Density | Avg Shard per Node | Mining EXP Multiplier | Best Level Range |
|---|---|---|---|---|
| Spawn Ring | Very High | 1.1 Rare | x1.0 | 1-8 |
| Shrine Path | High | 1.0 Rare + 0.1 Epic | x1.0 | 5-12 |
| Western Slope | Medium | 0.9 Rare + 0.15 Epic | x1.1 | 10-15 |
The Western Slope is the underrated pick here because the slight mining EXP multiplier stacks with the higher Epic rate, and shrine offerings along the path let you cash shards into bonus EXP without a long travel detour. Players who try to push into the mid caves too early almost always come back to grind the Western Slope for an extra hour before the swing speed feels right.
Mid-Game Caves (Levels 15-35)
The mid-game caves unlock once your mining EXP level is high enough to break hard rock, which usually happens around level 15 with an Iron pickaxe. Node density drops slightly because the cave geometry forces you into winding tunnels, but every individual node pays more. The Epic shard rate climbs to roughly a quarter of all drops, and the first Legendary shards start appearing in single-digit percentages. This is also where shrine routing starts paying off, because cave shrines offer a one-time mining EXP bonus that resets every server tick.
| Cave | Node Density | Avg Shard per Node | Mining EXP Multiplier | Hard Rock Required |
|---|---|---|---|---|
| Echo Cave | High | 0.6 Rare + 0.5 Epic | x1.3 | Yes |
| Frost Hollow | Medium | 0.4 Rare + 0.6 Epic | x1.5 | Yes |
| Iron Gorge | Medium | 0.5 Rare + 0.7 Epic | x1.4 | Yes |
Frost Hollow is the community pick for steady Epic farming because the x1.5 mining EXP multiplier compounds with the higher Epic rate, and the cave layout clusters nodes near shrine rooms so you can clear a full loop in under four minutes. Iron Gorge pays slightly better in raw shards but the longer travel between nodes makes it less efficient per minute unless you already own a Reinforced pickaxe.
Endgame Crystal Caves (Levels 35+)
The endgame crystal caves are the late-game mining zones where Legendary shards finally become a real income stream rather than a lucky surprise. Node density is lower and the geometry is punishing, with vertical shafts and breakable bridges that punish careless players, but every node has a roughly one-in-five chance of dropping a Legendary shard, which is the only reliable way to fund tier-4 and tier-5 upgrade recipes. The mining EXP multiplier also climbs to x1.8, which is the fastest XP gain in the game outside of dedicated EXP shrines.
| Cave | Node Density | Legendary Rate | Mining EXP Multiplier | Pickaxe Required |
|---|---|---|---|---|
| Shattered Spire | Low | 18% | x1.7 | T3 Reinforced |
| Hollow Echo | Low | 20% | x1.8 | T3 Reinforced |
| Crystal Reach | Very Low | 22% | x2.0 | T4 Crystal |
Crystal Reach is the endgame grind spot, but it requires the full T4 Crystal pickaxe, a reinforced armor set, and a cleared questline that gates the entrance. Most players spend their first run in Hollow Echo because the entry requirement is lower and the Legendary rate is only two points behind Crystal Reach. Both caves share a common pattern: bring a repair kit, bank shards every 15 minutes, and never push past the third bridge without a full health bar.
Mining EXP, Leveling, and Reward Unlocks
Mining EXP is the secondary currency that determines how fast you can break nodes, how deep you can push into harder caves, and which recipes you can afford at the anvil. Every swing gives a flat chunk of mining EXP, but the real gains come from multipliers stacked across pickaxe tier, zone multiplier, shrine buffs, and the occasional EXP-burst event that fires when you break a high-grade node. Most players underestimate how much a 10-15% multiplier compounds over a full session, which is why the gap between casual and optimized miners widens fast.
The other thing to know is that mining EXP levels unlock more than just better swings. Each level tier gates a specific set of recipes, shrine offerings, and cave entrances, so a stalled mining EXP bar is also a stalled progression bar. Treat it as a second main stat, not a side meter.
Mining EXP Sources and Multipliers
Every source of mining EXP stacks additively with your pickaxe bonus, which means a T3 pickaxe in Frost Hollow with a shrine buff can hit close to x3.0 effective EXP per swing. The table below lists the main sources and their relative weights so you can plan a route that maximizes the stack.
| Source | Mining EXP per Swing | Stacks With | Notes |
|---|---|---|---|
| Base node swing | 5-10 EXP | Pickaxe bonus | Flat baseline |
| Pickaxe tier bonus | +20-80% | Zone multiplier | T3 is the breakpoint |
| Zone multiplier | x1.0 to x2.0 | Shrine buff | Endgame caves are x2.0 |
| Shrine buff | +15-30% | All sources | Resets every server tick |
| High-grade node burst | +50 EXP bonus | One-shot | Triggers on Epic+ drops |
Data sourced from community testing. Notice that the high-grade node burst is the swing-efficient wildcard: a single Epic drop on a T3 pickaxe in a x1.5 zone with a shrine buff can net over 200 mining EXP from one node, which is roughly the same as ten swings on a starter plateau. Route planning around shrine timers and high-grade node spawns is the single biggest optimization you can make.
Level Milestones and What They Unlock
Mining EXP levels are not just a number on the screen. Each tier unlocks a specific set of recipes, cave entrances, and anvil options that gate your next stage of progression. The table below lists the key breakpoints based on community data and the in-game anvil UI.
| Mining Level | Unlocks | Recommended Pickaxe | Cave Access |
|---|---|---|---|
| 1-10 | Basic shard recipes, starter nodes | T1 Starter | Plateau only |
| 11-20 | Hard rock nodes, Iron pickaxe recipe | T2 Iron | Echo Cave |
| 21-30 | Epic recipes, shrine offerings, Frost Hollow | T2-T3 | Frost Hollow, Iron Gorge |
| 31-40 | Reinforced pickaxe, Legendary recipes | T3 Reinforced | Shattered Spire, Hollow Echo |
| 41+ | Crystal pickaxe, endgame recipes | T4 Crystal | Crystal Reach |
Most players hit level 30 inside two to three focused sessions if they route shrine buffs and stay in the mid caves. Hitting 41+ takes longer because the endgame caves have lower node density, so the EXP-per-minute curve flattens out. This is also the point where the Poly Loot quest line and NPC order starts overlapping with mining, because several quests require shards and mining EXP milestones before they will trigger.
Mining Rewards and How to Spend Them
Mining rewards come in two flavors: the shards and crafting resources that drop directly from nodes, and the long-term unlocks that mining EXP gates at the anvil. Knowing which rewards to spend immediately and which to bank for late-game recipes is the difference between a smooth progression curve and a frustrating stall around level 30. The general rule is to bank Legendary shards, spend Rare shards as fast as you earn them, and treat Epic shards as a flexible reserve.
There is also a side economy built around mining that most beginners miss. Mining feeds the shard farming and crate system, and several of the late-game recipes require a mix of shards, mined crystals, and crafted ingots that you cannot buy from any NPC. Mining is the only renewable source for most of these inputs, which is why the late-game market treats high-grade mining as a service rather than a personal grind.
Immediate Spend vs. Bank Decisions
The decision tree for spending mining rewards is straightforward once you understand which recipes are time-gated. Most Rare-tier recipes are repeatable, so spending Rare shards as soon as you have them is correct. Epic recipes split into repeatable and one-shot, with the one-shot recipes being the ones worth banking for. Legendary recipes are almost all one-shot, which is why banking Legendary shards is the default until you have the anvil level and the side materials to actually use them.
| Reward | Spend or Bank | Best Use | Priority |
|---|---|---|---|
| Rare Shard | Spend | Tier 1-2 upgrades, NPC quests | High |
| Epic Shard | Mixed | Tier 3 recipes, shrine offerings | Medium |
| Legendary Shard | Bank | Endgame crafting, enchant loops | Low until 40+ |
| Mined Crystal | Bank | Late-game ingot recipes | Always |
| Crafting Ingot | Spend | Anvil repairs, mid recipes | High |
If you are sitting on a stack of Legendary shards below level 40, the correct play is to leave them in the bank and spend the time pushing mining EXP instead. Most beginners blow their early Legendary haul on recipes they cannot fully use, which leaves them under-geared when they finally push into the endgame caves.
Mining as a Late-Game Service
Once your mining setup is at T4 Crystal with a full armor set, mining stops being a personal grind and becomes a tradeable service. Most late-game players will pay shards or crafted items for a cleared Crystal Reach run, because the node density is so low that a single geared player can clear a session's worth of nodes for a small group. The economics work because the geared player earns roughly three times the shard rate per swing compared to an undergeared one, which leaves headroom for a fair split.
This is also the point where mining ties into the rest of the game's grind ecosystem. Boss badges, elemental hunts, and the high-tier quest lines all require Legendary shards as a base material, which means a geared miner is effectively funding every other late-game activity. The Poly Loot boss badge unlock list is a good example: several of the badge summon recipes require Legendary shards that you can only farm efficiently with a T4 pickaxe in the endgame caves.
Advanced Mining Tips and Efficiency Loops
The difference between a casual miner and an optimized one is not grinding longer, it is grinding smarter. Most of the efficiency gains come from stacking multipliers you did not know existed, routing your swing path to minimize downtime, and timing your sessions around shrine resets and server tick cycles. The tips below are pulled from community data and player reports on the most efficient mining loops in Poly Loot.
If you are already deep into the mining grind and want route-specific advice, the Poly Loot where-to-mine route map covers node clustering and shrine routing in detail. The section below focuses on the cross-cutting optimizations that apply to every zone.
Stacking Multipliers for Max EXP
The single highest-EXP swing in the game combines a T4 Crystal pickaxe, a x2.0 endgame cave, a shrine buff, and a high-grade node burst. The math looks like this on a single Epic drop: base 10 EXP times the pickaxe bonus, times the zone multiplier, plus the shrine buff, plus the 50 EXP burst. The result is a swing that can clear 250-300 mining EXP from a single node, which is roughly the same as thirty swings on the starter plateau with a T1 pickaxe.
| Stack Layer | Bonus | Cumulative Multiplier |
|---|---|---|
| T4 Crystal pickaxe | x1.8 | x1.8 |
| Crystal Reach (x2.0) | x2.0 | x3.6 |
| Shrine buff (+30%) | +30% | x4.7 |
| High-grade burst | +50 flat | Burst on top |
The shrine buff is the easiest layer to miss because it resets every server tick, which means the optimal session is to log in right after a tick, rush to the nearest cave shrine, and clear the highest-density node cluster before the buff fades. Most players who skip this step leave 25-30% of their effective EXP on the table.
Avoiding Common Mining Mistakes
The most common mining mistakes are easy to fix once you see them, which is why the late-game community has condensed them into a short list that gets pasted into every Discord mining channel. The mistakes below are the ones that show up in player reports most often, ranked by how much EXP they cost over a full session.
-
Swinging without a shrine buff costs roughly 25% of your effective EXP per session. Always check the shrine timer before starting a loop.
-
Breaking only the closest node ignores the high-grade node burst. Route your swing path so you hit at least one Epic-weighted node every two minutes.
-
Ignoring pickaxe durability forces a mid-loop repair trip that breaks your rhythm. Swap to a fresh pickaxe at 20% durability rather than waiting for it to break.
-
Banking too many Rare shards delays the tier upgrades that unlock harder caves. Spend Rare shards on the first repeatable recipe you can afford.
-
Pushing into Crystal Reach without T4 wastes a full session's worth of swings on nodes you cannot break efficiently. Stay in Hollow Echo until your pickaxe is fully upgraded.
Each of these mistakes is a multiplier loss rather than a single swing loss, which is why they compound over a long session. Fixing two or three of them is usually enough to shift your shard income by 30-40% without changing how long you grind.
Frequently Asked Questions
What is the fastest way to level mining in Poly Loot?
Route shrine buffs into Frost Hollow or Hollow Echo with a T3 Reinforced pickaxe, swing the densest node cluster near each shrine, and bank every Legendary shard. The shrine buff and zone multiplier together push effective EXP per swing above x3.0, which is the fastest grind curve outside of Crystal Reach.
How do I get Legendary shards in Poly Loot?
Legendary shards drop from high-grade nodes in the mid-game caves at a 4-7% rate and climb to 18-22% in the endgame crystal caves. The most reliable farm is a T3 pickaxe in Hollow Echo, because the entry requirement is lower than Crystal Reach and the Legendary rate is only two points behind.
Do pickaxe tiers really change shard drop rates?
Yes, and the jump from T2 to T3 is the biggest breakpoint. The community data shows a roughly x1.5 increase in shard roll bonus between Iron and Reinforced pickaxes, which is why most players rush the Iron anvil before pushing into harder caves and prioritize the Reinforced recipe above most Epic shard spends.
Should I spend or bank Legendary shards?
Bank them until you are at mining level 40 with a T3 pickaxe and a cleared Crystal Reach entrance. Most Legendary recipes are one-shot and require side materials you cannot farm until the endgame, so spending them early usually means re-farming the same tier later.
Can I mine in the starter plateau forever?
You can, but the shard income plateaus hard and the mining EXP multiplier never climbs above x1.0, so you will fall behind on every other grind. Push into Echo Cave by level 15 and Frost Hollow by level 20, because the higher zone multipliers are the only way to keep the EXP curve climbing through the mid-game.